Showing posts with label socks. Show all posts

Friday, January 11, 2019

Worsted Weight Socks

I got a pair of tiny 9" knitting needles in size 8, so I went looking for patterns that I could use them with. I decided that a pair of socks was just the thing. I found one pattern which had me cast on 40 stitches and had a heel flap heel. I started at the top and knit the leg and it seemed like it might be too big. I tried it on and wasn't sure, so I worked the heel and part of the foot. I then tried it on again and it was definitely too big.
My original attempt

I also didn't like the look of the heel flap, so I did a search for a short row heel sock made with worsted weight yarn. I didn't find anything that I liked, so I decided to figure out my own pattern. In the process of looking for a sock pattern, I learned about Shadow/Twin Stitch Short Rows for heels from this video:

This is what I did for my socks:

1. Cast On 32.
2. K1 P1 for 8 rows (~1") 
3. Knit even for 20 rows (until top of sock measures ~5 1/2")
4. Knit 7, make Twin Stitch Knit (TSK). Switch to new needle and slide TSK       onto it. Turn
5. Purl 14, Twin Stitch Purl (TSP). turn
6. * K to 1 before TSK, make TSK, turn, Purl to 1 before TSP, make TSP, turn *
7. Repeat * to * until there are 5 Twin Stitches on each side and 6 regular stitches in the middle.
8. < K to TS, Knit TS as 1 stitch, make next TS into a Triplet (same as a Twin Stitch, only now there are 3 loops), Turn. Purl to TS, Purl TS as 1 stitch, make next TS into Triplet. Turn >
9. Repeat < > until there is 1 TS on each end. Switch back to 9" needle. Slide TS back onto it.
10. Knit 7 stitches, Place Marker. Continue knitting around back to marker, treating TS as 1 stitch.
11. Knit even for 20 rows (~6" from back of heel)
12. Remove marker. Knit 8. Switch to magic loop needle (I lost one of the 9" needles).
13. K1, SSK, K 10, K2tog, K1, Pull loop to move to back of sock. K1, SSK, K to 3 from end, K2tog, K1
14. (K1, SSK, K to 3 from end, K2tog, K1) Repeat on both sides of sock
15. Knit even
16. Repeat rows 14 and 15 until there are 4 stitches left on each side. Kitchener stitch to bind off.


One somehow ended up longer than the other!


These socks fit better than the ones I had started with, but were still a little big, so I started with 28 stitches and they fit just right, except I'm not 100% satisfied with the toe. I may alter the pattern to fix that, so stay tuned.

1. Cast On 28.
2. K1 P1 for 8 rows (~1") 
3. Knit even for 20 rows (until top of sock measures ~5 1/2")
4. Knit 6, make Twin Stitch Knit (TSK). Switch to new needle and slide TSK  onto it. Turn
5. Purl 12, Twin Stitch Purl (TSP). turn
6. * K to 1 before TSK, make TSK, turn, Purl to 1 before TSP, make TSP, turn *
7. Repeat * to * until there are 5 Twin Stitches on each side and 4 regular stitches in the middle.
8. < K to TS, Knit TS as 1 stitch, make next TS into a Triplet (same as a Twin Stitch, only now there are 3 loops), Turn. Purl to TS, Purl TS as 1 stitch, make next TS into Triplet. Turn >
9. Repeat < > until there is 1 TS on each end. Switch back to 9" needle. Slide TS back onto it.
10. Knit 6 stitches, Place Marker. Continue knitting around back to marker, treating TS as 1 stitch.
11. Knit even for 25 rows (~6" from back of heel)
12. Remove marker. Knit 7. Switch to magic loop needle.
13. K1, SSK, K 8, K2tog, K1, Pull loop to move to back of sock. K1, SSK, K to 3 from end, K2tog, K1
14. (K1, SSK, K to 3 from end, K2tog, K1) Repeat on both sides of sock
15. Knit even
16. Repeat rows 14 and 15 until there are 4 stitches left on each side. Kitchener stitch to bind off.


Tuesday, January 31, 2012

Tutorial: How to make a sock monkey out of 2 pairs of anklet socks

I found some socks that I thought would make cute sock monkeys.  Unfortunately, they were very short and didn't have any part that would come up the leg (if you were wearing them) so there wasn't anything to use for the legs.  I decided to buy 2 matching pairs of the socks and see if I could get it to work!

Here is how I did it:
Take 2 pairs of anklet socks

Cut off the top just under the heel on 1 sock

Cut off just the ribbing on 1 sock

On the sock that you cut off under the heel, cut from the toe to the opening
NOTE:  I would suggest starting at the toe and cutting to within 1" of the top where you cut off the heel (leaving an uncut band at the top)

Pin the 2 socks' cut edges together lining up the top and bottom of the socks

Sew ¼" from edge all the way around

This is what you end up with

Turn it inside out with the heel on top

Sew.  Clicking the picture will enlarge it making it easier to see the marks.
I ended up with more left over pieces having to use 2 pairs.

Turn right side out

This is why I would leave the 1" band uncut at the top

Stuff

I also had to sew this extra area shut, too

Sew him together

Here is the seam along the belly where the 2 socks were attached together

Monday, January 30, 2012

Tutorial: How to make a sock monkey out of one knee high sock

I found a pair of knee high socks that I wanted to use for a sock monkey.  I figured that there had to be a way to get a sock monkey out of only 1 sock since to use both socks on 1 monkey would mean LOTS of left over scraps. 

Here is how I did it:

Take 1 sock ☺

Turn it inside out so the heel is on top

Sew the pieces. 
If you click on the picture it should be easier to see the marks

Cut the pieces apart

This is all that I had as extras!

Turn right side out


Stuff

Sew him together - Ta da!

Thursday, January 5, 2012

Sewing Lesson

I've been working on sewing sock monkeys lately as I got some orders for Valentine's Day ones.  I was looking at the dollar store for new socks (I don't look at socks as socks.  I look at them for their potential to be sock monkeys!) and found some really cute infant socks.  I had to start one to see how they worked.  When Emily saw it, she wanted to sew her own...so we made a run to the dollar store after dinner and the kids all picked out a pair they liked.  Back at home, I drew 3 lines on each of 3 papers - 1 straight, 1 wavy, and 1 zig zagged.  The 3 oldest kids got an quick lesson on foot pressure and hand placement and they then "sewed" on the lines (without any thread).  The next day, they moved on to sewing their names onto felt.  I chose all capitals as that would be less curves!  I had to put the foot pedal on a stool (and in William's case, had to put a cushion from the chair under the stool) in order for them to be able to reach ☺  Then they sewed around the edges and made little pillows.  Next, we moved on to the actual socks.  For those, I actually sat behind them and controlled the sock and they pushed the foot pedal.  Andy sat on my lap and helped with the sewing of the pillow, but I did his sock monkey completely myself.  William helped sew his and stuffed it, but had me do all the hand work.  The girls did all the stuffing and hand sewing themselves. We had to stay up a little past bedtime so they could get them completely finished!  (Even though Emily is wearing 3 different outfits in the pictures, it was all one day!!)
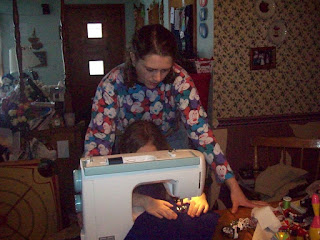
Emily's turn


Dan liked how William was so short, he could see under the sewing machine!

I controlled the reverse button


Andy's turn

Yes, Andy has blue inside his ear!  His legs were also "decorated"

Stuffing his pillow

Sarah's turn


All finished


Sarah picked black for her name, so it dosen't show up very well.


Sarah made an elephant and Emi made a bunny